Monday, June 30, 2014

Camp Run-A-Muk Birthday Party


I’m excited to kick off the new week with a CAMPING themed birthday party that was an absolute blast! And that’s exactly what a party is supposed to be, right?!

My son Gavin's favorite show of the moment is Disney's "Gravity Falls." He also just became a cub scout so when he asked for a camping themed birthday party I was not surprised. I am not what you would call (err...) the best camper so I had to dig deep on this one. 

THE MODELS
Xander Wren, Renya Morrissey, and Gavin Morrissey (the birthday boy!)
THE FAVORS
This was such a fun adventure for Gavin & his guests at “Gavin’s Camp Run-A-Muk“, where our campers were greeted with their gear packs (complete with canteens, mini binoculars, compasses, flashlights & more!) Keeping with the "Gravity Falls" theme I stencil painted the signature tree on the packs.
I also made buttons for the kids that said, "I like to go camping at Gavin's Camp Run-A-Muk."


THE ACTIVITIES
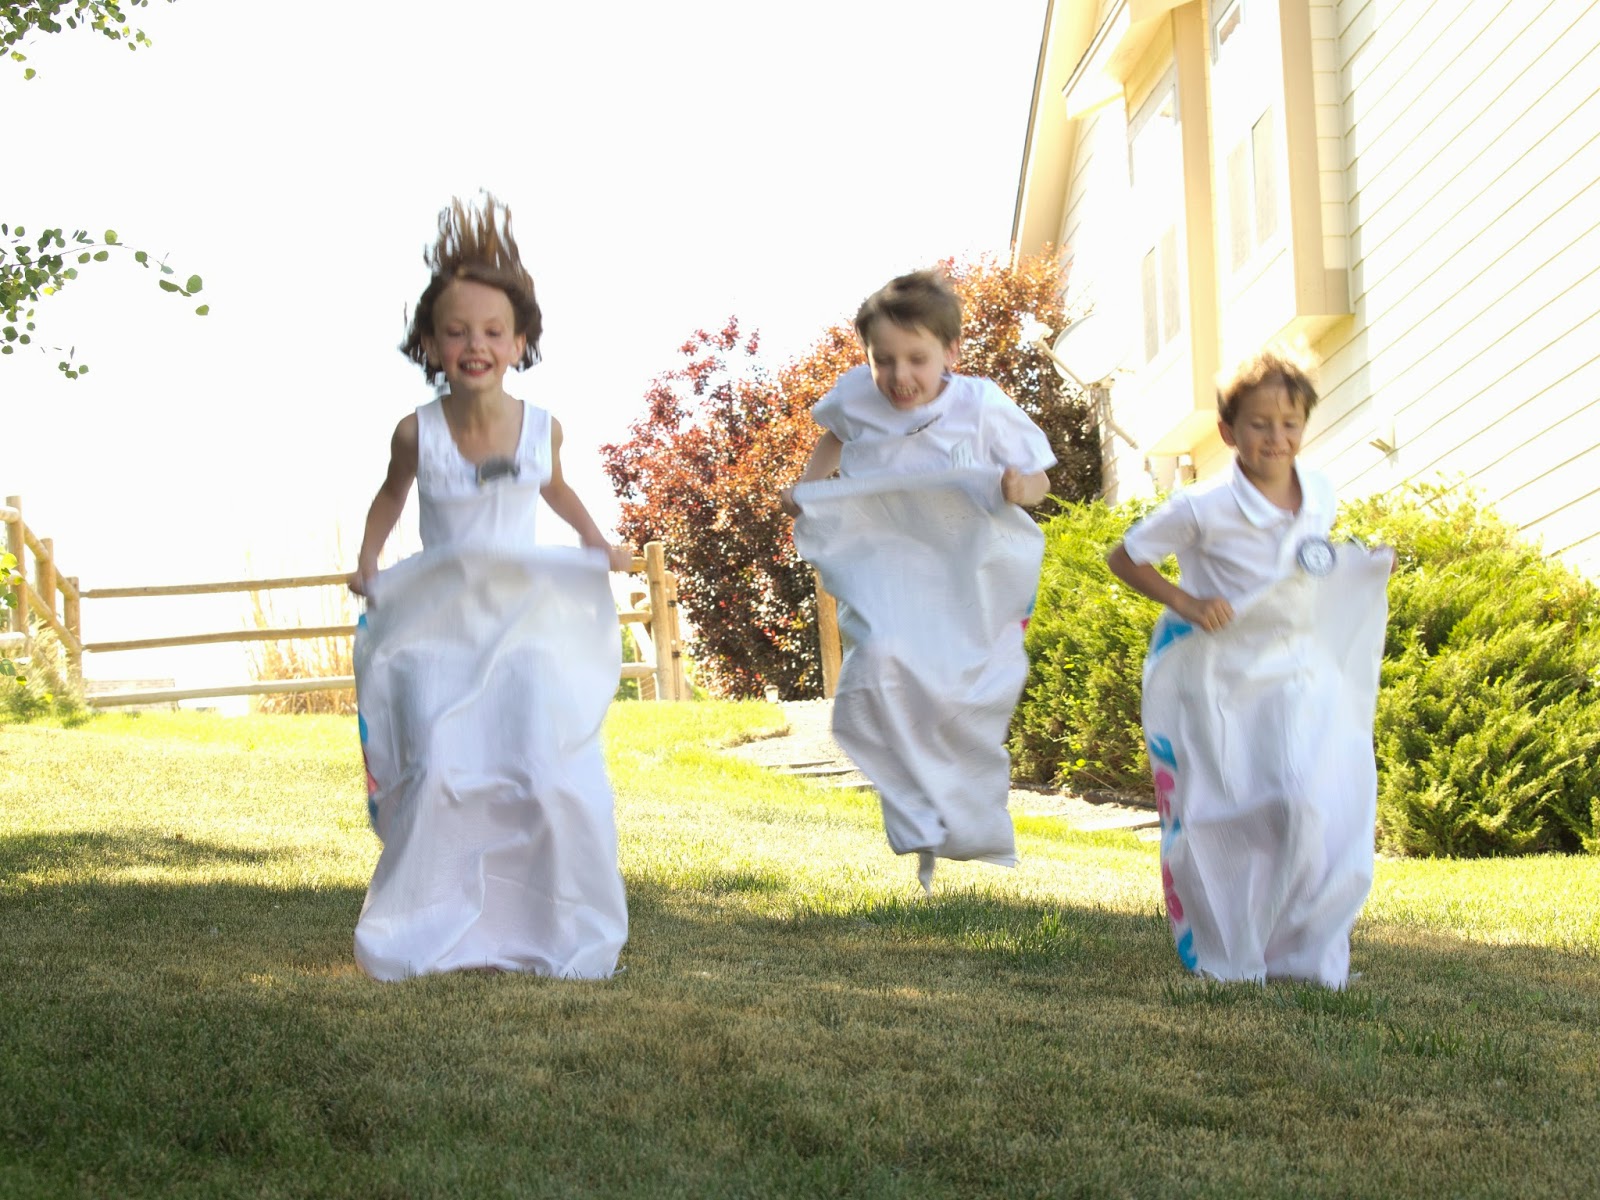
A trick that I've learned with sleepover parties is to sugar the kids up and then wear them out early so that they go to bed at a reasonable hour. And it worked because all 10 kids were fast asleep by 12:00 am! To achieve this we did a bunch of camp-style relay games (sack race, 3-legged race, etc), tug of war, musical lawn chairs, and more!

The scavenger hunt was also a bit hit. I came up with a list of nature type things that the kids could find in our yard.

I always try to come up with some kind of craft for the kids to do. I knew that I wanted them to make bandana's so I created an outline cartoon design and had Spoonflower print it on fabric. I cut the fabric into 20”x20” squares for bandana’s and the kids used fabric markers to color them in.


At the end of the night the kids told "scary" campfire stories. It was so adorable to see what they considered scary. I compiled a bunch of kid friendly campfire stories and made a book that my son and sister read during the party to get the kids ready to tell their own stories.


THE FOOD
Our guests chowed down on grub that I placed in gable boxes (each contained a juice, sandwich, and bag of chips.) The gable boxes turned out to be very useful because the kids used them to keep track of their prizes and candy throughout the day and night.                                                
I also served “trees and berries” which were mason jars filled with a mixed berry salad. I attached paper trees to paper straws and stuck them into the hole in the mason jar lids. 

I filled pretzel bags with homemade trail mix and slapped on a custom label.
Keeping with my plan to sugar the kids up I also served a variety of candy and treats including “sleeping bags” (rolled sour belts), “bear poop” (no bake cookies), "grab your bait" (gummy worms in vending machine capsules), “acorn and twigs,” and cherry gummy bears labeled “Don’t feed the bears” (FYI - cherry gummy bears are the BOMB!!!)
YUMMY! NOT! The realistic worms couldn't be any grosser (is that a word?) to watch the kids eat but they loved the reactions they got while doing it. 
The kids especially loved the s’mores table, which deviated from traditional recipes by adding a variety of marshmallow, chocolate, and graham cracker flavors. I came up with a few recipe ideas, designed a menu, and had it mounted on poster board. The kids each picked their flavors and then toasted marshmallows under the stars.
I was worried that the coconut marshmallows would burn but they were soooo good toasted on the fire. Seriously, if you come across coconut marshmallows buy them!

THE DECORATIONS
A few of my favorite decorations was a tent that I made for the table using a piece of white fabric and cardboard. I thought this was going to be a BEAR to make but it literally took me a few minutes. I then hung a “Gavin’s Camp Run-A-Muk” banner on it. (Hmmm... I should have ironed the fabric.)
I also loved how the bunting turned out. There was a dead tree in my neighborhood that was about to be cut down so I helped myself to a long branch. I then hung the bunting pieces from it. Truth be told, I helped myself to a lot of dead branches from that tree to create my vision of a forest in my kitchen. My vision was a bust though!
THE CAKE
Last but least the cake! My son loved this cake (I know its hard to tell by the photo :).
The fox, bear, tree, and banner are all paper. I printed and cut out the fox and bear which were design elements from the rest of the party. I also made 3-dimentional tree's that I hung the banner "Camp Gavin." Gavin decided where everything should go and thought it was hilarious to have the bear peeking into the tent. :)


Please let me know your thoughts on this party by commenting below. Is this a theme that you would or have used in the past? Thanks!

Party on!
Angie

CREDITS


Monday, June 23, 2014

The Great Grand Glittery Giveaway

So honored to be asked to be a part of this giveaway. Enter for your chance to win one of many $444 cash prizes. 


To enter follow this link a Rafflecopter giveaway. Good luck!

Monday, June 9, 2014

Start the Summer Off Right $1000 Cash Giveaway

We are starting the summer off right - with a huge cash prize giveaway! 


This giveaway could not be possible with a group of amazing bloggers and businesses including Spaceships and Laser Beams, Designed by Dawn Nicole, Fantabulosity, A Delicate Gift, Anders Ruff Custom Designs, Samantha Walker LLC, Dime Party Divas, UR invited, J'adore Lexie CoutureA Wife A Mom A LifeA-Manda Creation, Design Dazzle, Merry About Town, Sugar Sugar Cake Designs, Be Envied Entertaining, Lauren McKinsey, BellaArtista Invitations, Unlimited Party ThemesDebbie Donato, For the Love of Food, Grown Ups Magazine and Reality To Dreams. And that's not everyone!!! To see all of the sponsors, click on the Rafflecopter form at the end of the post.

Start the Summer Off Right $1000 Cash Giveaway
Monday, June 9, 2014 at 11:59PM EST to Monday, July 7, 2014 at 11:59PM EST
Open Worldwide

Prize: One winner will receive $1000 USD payable via PayPal
Eligibility and Rules: This giveaway runs from Monday, June 9, 2014 at 11:59PM EST to Monday, July 7, 2014 at 11:59PM EST. It is open to individuals over the age of the majority in their home country. The winner will be chosen randomly through the Rafflecopter form. It is the sole responsibility of the winner to report to and adhere to all laws in their respective country, which includes payments to any governing tax body. This giveaway is void in any country or territory where it is prohibited by law.
Claiming Prize: The prize will be sent via PayPal. The winner must have a PayPal account to receive it. The winner also must claim their prize within 48 hours of receiving notice. If you do not claim your prize within this time frame, your entry will be void and another winner will be drawn. Please ensure that  spaceshipsandlaserbeams [at] gmail [dot] com is on your "safe list."
Disclosure: This is a blogger-sponsored event that is in no way affiliated with PayPal, Facebook, Twitter, Pinterest, Instagram or any other social media channel. If you have questions, email Stephanie at Spaceships and Laser Beams at spaceshipsandlaserbeams [at] gmail [dot] com.
Please use the Rafflecopter below to enter! None of the entries are mandatory but the more entries you do, the more chances you have to win! Running short on time? Come back as often as you like to finish the form and maximize your chances of winning the big prize.

$1000 Cash Giveaway

++++++++++++ Here’s the Rafflecopter giveaway code separate from the post, should it not be working for you: a Rafflecopter giveaway

Wednesday, March 5, 2014

Puppy Love :: Stuffed Safari :: Coupon Code


I just got these adorable stuffed dogs from Stuffed Safari. They will be used in my upcoming "Puppy Love" party that I will be creating for the book in a few months. {My daughter recently  told me that it should be her theme for her 9th birthday party so I get to kill two dogs with one party!!} As a sneak peak I will be creating a dog spa for this party where the kids can pick handmade collars, bows, and skirts for their dogs as well as brush and spray them with perfume. What a dog-gone terrific idea!

Here are a few of the stuffed dogs I picked out! I choose the Fiesta brand because they are big (nine-inches) enough to hand make accessories for and priced just right (under $10.00!!). A few of my favorite dogs are the super cute white terrier and pug (unusual to find a pug stuffed animal without huge weird eyes).


Be sure to enter code PIECEOFCAKE for an additional 15% off orders over $25. Plus all orders over $75 receive free shipping!

Friday, February 21, 2014

Easy to Stack Vertical Scribble Me A Rainbow Cake

I recently attempted to make one of those gorgeous rainbow cakes that can be seen all over Pinterest. Those of you who have been following this blog for awhile know that I am cake-decorating-challenged. So not surprising that the layers crumbled apart and resembled a mud slide. While that didn't stop us from eating it I was determined to make one that also looked good. I talked to a baker friend of mine who suggested stacking the layers vertically to alleviate the weight and it worked! 


{PS - my daughter used edible markers to draw on the outside of the cake to add to the rainbow effect!} 


Scribble me a Rainbow Cake
How long it will take: 2 hours to make; 2 hours freezing time
Yield: 24 servings

Ingredients
- two boxes of white cake mix (plus box ingredients)
- edible markers
- six colors of gel (for vibrancy) food coloring (red, orange, yellow, green, blue and purple)
- tub of frosting (for layers)
- ready to use rolled fondant
- butter
- flour

Tools
- six 4” square cake pans
- six mixing bowls
- cooling rack
- stand mixer
- toothpicks
- spatula
- large serrated knife
- whisk
- cake platter
- two skewer sticks

Make cake batter according to package instructions. Butter and flour six cake pans (reuse pans if you don’t have six.) Pour one cup of batter in each of the six mixing bowls. Whisk a fair amount of the appropriate food coloring into each bowl. Keep in mind that the color of the unbaked batter will be the color of the baked batter. Pour into the square pans and bake for 15 minutes each. Cake is done once a toothpick inserted into the middle of the cake comes out clean. To avoid cake from tearing, let pans rest on the cooling rack for 10 minutes. Then pop cake out, cover individually with plastic wrap, and place in the freezer for at least two hours.

Use the serrated knife to make the top of each of the cakes flat. Using spatula, smooth frosting on the top of and one side of the cake. Place the cake so that it is vertical on the outer edge of the platter. Repeat with the remaining cakes, stacking the layers vertically in order: red, orange, yellow, green, blue, and purple. Once all layers are stacked vertically, use spatula to smooth frosting on the cake until covered.

Following package instructions carefully cover cake with rolled fondant. You can fold the edges of the fondant in to resemble a wrapped present.

If this is a birthday cake you can have the birthday child scribble and draw all over the cake with edible markers. This will be something she will be proud to show off at the party. And/or, during the party you could ask all of the children to write a message or drawing on the cake for the birthday child.


Friday, January 31, 2014

Valentine's Day Chocolate Bar Wrappers {FREE PRINTABLE}


These candy bar valentine's are so cute and easy to make. Just print, cut out, and wrap around a full-sized chocolate bar. And voila! You have some pretty SWEET treats for Valentine's Day. With two styles to choose from your child is sure to fall in {LOVE} with this valentine idea.


DOWNLOAD "I'm Over the Rainbow for You" Wrappers


DOWNLOAD "Chocolate for Your Valentine's Day Candy "Stache" Wrappers


INSTRUCTIONS ON HOW TO MAKE
What You Need:
- Photo Paper 
- Double-sided Tape
- Tin Foil
- Full-sized Chocolate Bars
- Scissors or paper trimmer
- Writing Utensil

Step 1: Download the wrapper using the link above and print the amount need (there are two per page so if ten wrappers are needed print five) on photo paper. 

Step 2: Use scissors or a paper trimmer to cut out the wrappers.

Step 3: Use writing utensil (marker, pencil, crayon, etc.) to add your child's name and who the chocolate bar is going "To". 

Step 4: Remove the outside wrapper from the chocolate bars. 

Step 5: If the bar is not already prepared accordingly, wrap chocolate bars neatly with tin foil.  

Step 6: Fold the wrappers:
The "Chocolate for Your Valentine's Day Candy "Stache" wrappers have white dotted lines in the almost center that are to be used as guides for folding.

The "I'm Over the Rainbow for You" wrappers" will be folded on the lines of the blue box that is almost in the center of the wrapper.

Step 7:  Place the chocolate bar into the wrapper so that it is centered. Flip candy bar over on the side that has the two open flaps. Keeping in mind that the top flap is the side that you wrote on in Step 3; attach two strips of double-sided tape, one on each inside edge of the top flap. Line up the flaps and push together to close. Adjust the wrapper so that it is centered on the bar.

Front and Back of the 
"Chocolate for Your Valentine's Day Candy "Stache"

Front and Back of the
"I'm Over the Rainbow For You Wrappers.