Showing posts with label birthday parties. Show all posts

Monday, June 30, 2014

Camp Run-A-Muk Birthday Party


I’m excited to kick off the new week with a CAMPING themed birthday party that was an absolute blast! And that’s exactly what a party is supposed to be, right?!

My son Gavin's favorite show of the moment is Disney's "Gravity Falls." He also just became a cub scout so when he asked for a camping themed birthday party I was not surprised. I am not what you would call (err...) the best camper so I had to dig deep on this one. 

THE MODELS
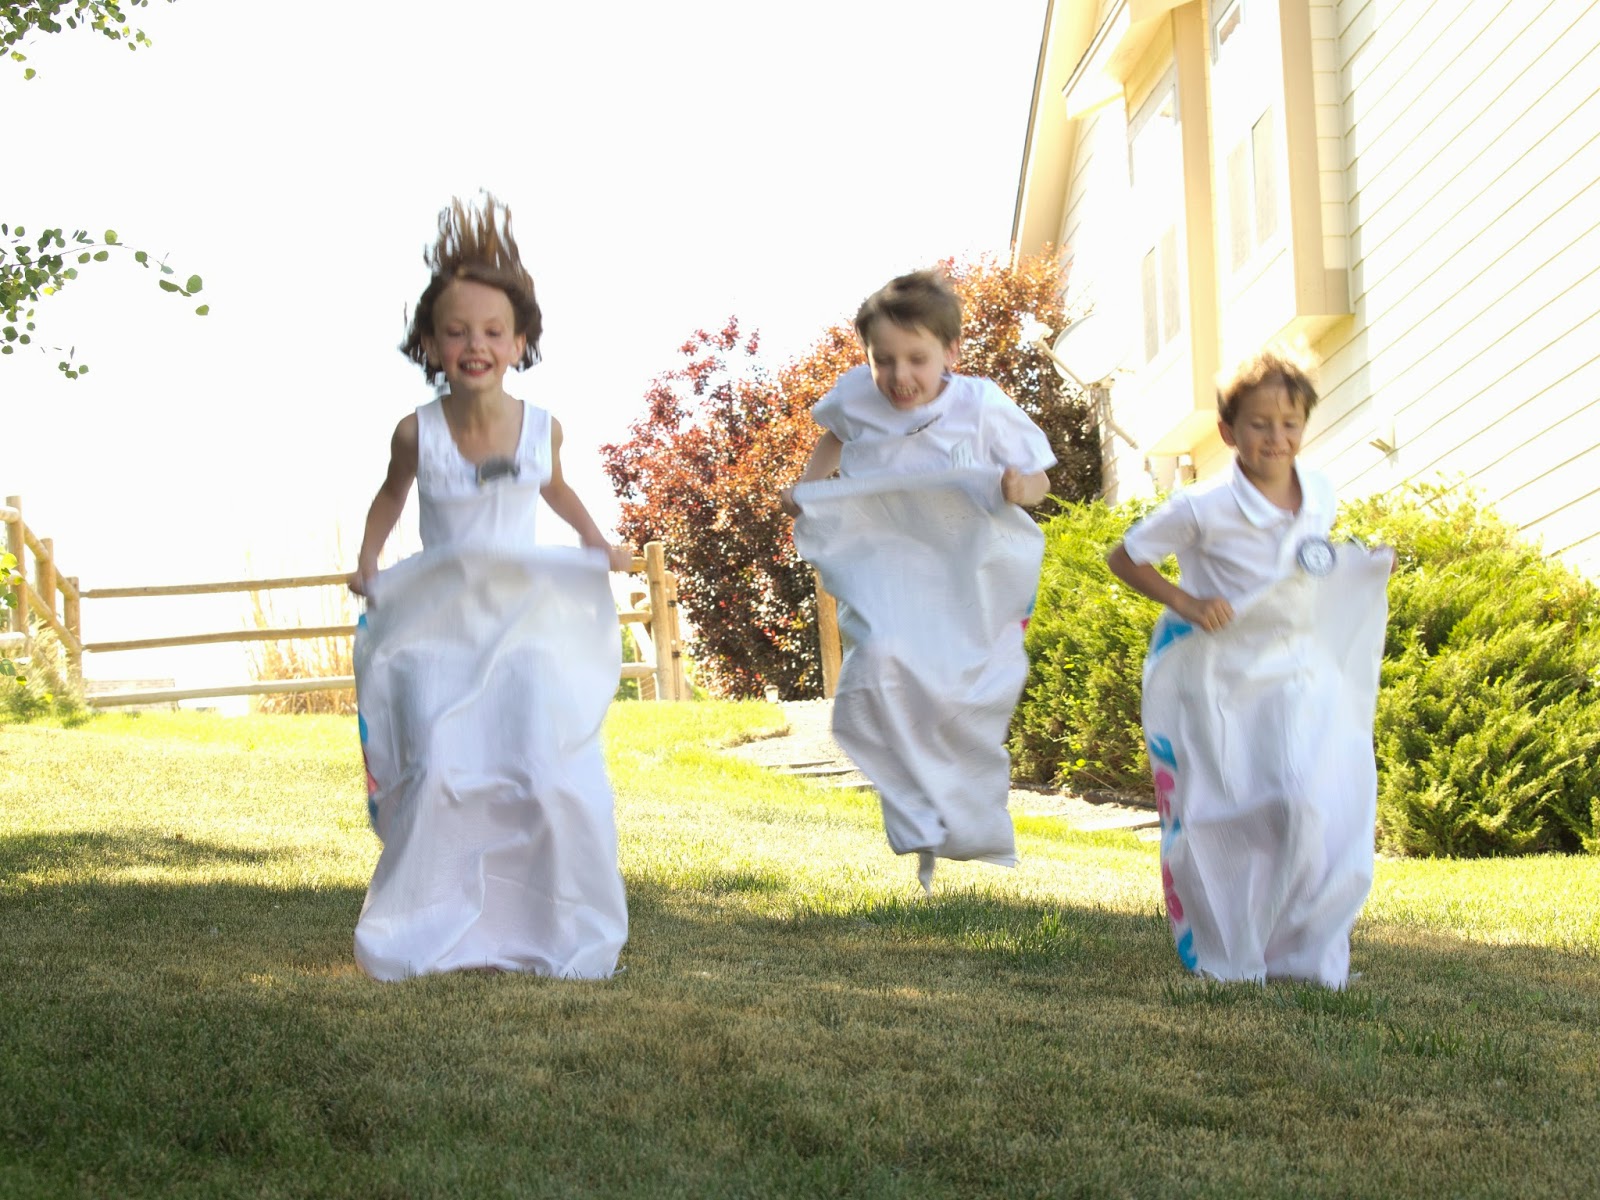
Xander Wren, Renya Morrissey, and Gavin Morrissey (the birthday boy!)
THE FAVORS
This was such a fun adventure for Gavin & his guests at “Gavin’s Camp Run-A-Muk“, where our campers were greeted with their gear packs (complete with canteens, mini binoculars, compasses, flashlights & more!) Keeping with the "Gravity Falls" theme I stencil painted the signature tree on the packs.
I also made buttons for the kids that said, "I like to go camping at Gavin's Camp Run-A-Muk."


THE ACTIVITIES
A trick that I've learned with sleepover parties is to sugar the kids up and then wear them out early so that they go to bed at a reasonable hour. And it worked because all 10 kids were fast asleep by 12:00 am! To achieve this we did a bunch of camp-style relay games (sack race, 3-legged race, etc), tug of war, musical lawn chairs, and more!

The scavenger hunt was also a bit hit. I came up with a list of nature type things that the kids could find in our yard.

I always try to come up with some kind of craft for the kids to do. I knew that I wanted them to make bandana's so I created an outline cartoon design and had Spoonflower print it on fabric. I cut the fabric into 20”x20” squares for bandana’s and the kids used fabric markers to color them in.


At the end of the night the kids told "scary" campfire stories. It was so adorable to see what they considered scary. I compiled a bunch of kid friendly campfire stories and made a book that my son and sister read during the party to get the kids ready to tell their own stories.


THE FOOD
Our guests chowed down on grub that I placed in gable boxes (each contained a juice, sandwich, and bag of chips.) The gable boxes turned out to be very useful because the kids used them to keep track of their prizes and candy throughout the day and night.                                                
I also served “trees and berries” which were mason jars filled with a mixed berry salad. I attached paper trees to paper straws and stuck them into the hole in the mason jar lids. 

I filled pretzel bags with homemade trail mix and slapped on a custom label.
Keeping with my plan to sugar the kids up I also served a variety of candy and treats including “sleeping bags” (rolled sour belts), “bear poop” (no bake cookies), "grab your bait" (gummy worms in vending machine capsules), “acorn and twigs,” and cherry gummy bears labeled “Don’t feed the bears” (FYI - cherry gummy bears are the BOMB!!!)
YUMMY! NOT! The realistic worms couldn't be any grosser (is that a word?) to watch the kids eat but they loved the reactions they got while doing it. 
The kids especially loved the s’mores table, which deviated from traditional recipes by adding a variety of marshmallow, chocolate, and graham cracker flavors. I came up with a few recipe ideas, designed a menu, and had it mounted on poster board. The kids each picked their flavors and then toasted marshmallows under the stars.
I was worried that the coconut marshmallows would burn but they were soooo good toasted on the fire. Seriously, if you come across coconut marshmallows buy them!

THE DECORATIONS
A few of my favorite decorations was a tent that I made for the table using a piece of white fabric and cardboard. I thought this was going to be a BEAR to make but it literally took me a few minutes. I then hung a “Gavin’s Camp Run-A-Muk” banner on it. (Hmmm... I should have ironed the fabric.)
I also loved how the bunting turned out. There was a dead tree in my neighborhood that was about to be cut down so I helped myself to a long branch. I then hung the bunting pieces from it. Truth be told, I helped myself to a lot of dead branches from that tree to create my vision of a forest in my kitchen. My vision was a bust though!
THE CAKE
Last but least the cake! My son loved this cake (I know its hard to tell by the photo :).
The fox, bear, tree, and banner are all paper. I printed and cut out the fox and bear which were design elements from the rest of the party. I also made 3-dimentional tree's that I hung the banner "Camp Gavin." Gavin decided where everything should go and thought it was hilarious to have the bear peeking into the tent. :)


Please let me know your thoughts on this party by commenting below. Is this a theme that you would or have used in the past? Thanks!

Party on!
Angie

CREDITS


Thursday, August 29, 2013

{Do It Yourself} Tulle and Doily Pom-poms


I am a lover of simple, easy, DIY projects that make a huge impact on a party. Pom-poms have become one of the most popular ways to decorate birthday parties, baby showers and weddings these days and for good reason. They can be big or small, one color or lots of colors, they are cheap to make and also pretty quick as well.

While tissue paper pom-poms are the most popular, today I wanted to show you how to make my two favorite lesser known versions: Doliy and Tulle pom-poms. Both are super girly and oh so, so pretty!


Tulle Pom-poms
Makes: 3
How long it will take: 1 hour
What you will need: 
- 36 yards of six-inch wide tulle
- ribbon (cut to length needed to hang the pom-poms)
- scissors
- 8” wide book (for wrapping)

Step 1: Cut three eight-inch strips of tulle and set aside for now. 

Step 2: Create a tulle jellyroll by wrapping tulle around the book 20-25 times. 

Step 3: Carefully slide the jellyroll off of the book, holding it so that it keeps its shape.

Step 4: Using the eight-inch strips of tulle made in Step 1, tie the jellyroll together in the middle (it should resemble a bow). Then take the ribbon and tie one end  on top of the tulle strip as tight as you can. The other end will be used to hang the pom-pom.

Step 5: A) Use scissors to cut apart the edges of the tulle so that they are now separate layers. B) Hold one side flat on a hard surface and trim the edges of the tulle so that it’s even. Repeat for the other side. 

Step 6: Pull the layers apart and fluff to create a full pom-pom. If needed, trim the edges some more until desired look is reached.


Tip: Based on the size of the tulle pom-pom you prefer, use a smaller or bigger book.


Doily Pom-pom
How long it will take: 1 hour
What you will need: 
- 36 eight-inch doilies
- ribbon
- scissors
- six brad fasteners

Step 1: Cut ribbon the length you will need to suspend them.

Step 2: Stack doilies into six groups of six.

Step 3: Hold one of the group of doilies in your hand and use tip of scissors to carefully puncture a small hole into the center of the stack. Insert a brad fastener into the hole and clamp down the ends. Repeat for additional groups.

Step 4: Gently cup the first doily into your hand and pull up so that it forms a flower. Repeat with next two layers. Turn the stack over and do the same with the other three doilies so that the doilies form two sides.

Step 5: Repeat Step 4 with remaining groups.

Step 6: Hold two of the groups together side-by-side.Tie together in the center so that the ribbon adheres the two groups as one. In other words, you are tying them together side-by-side.

Step 7: Fluff the pom-pom up until desired look is reached.

To purchase the polka dot doilies shown, go to www.shopsweetlulu.com

Thursday, August 15, 2013

Weekly Party Planning Tips - The Kids Are Always Right

I think the number one question us party planners get asked is what our "very best"party planning tips are. While sometimes advice will vary based on the type of party or theme of the article being written (stress-free, on a budget, new trends, etc) there are a few tips that are applicable no matter what type of party you’re planning. So I thought I’d do a weekly blog with my best advice on how to wow your little ones. 

This week I wanted to focus on the cardinal rule of planning kids birthday parties: The Kids Are Always Right.  In my experience, if you listen to the mini guest of honor it will make your job easier creatively and help them feel a part of their big day. 

Let the birthday child choose the theme(s).
The past few years my kids have generally known what their next birthday theme will be... the day after their last party. I haven’t always been given such a clear vision though. In the past when my kids ideas stall out, I sit down with them and start listing the things that interest and make them happy.  They could respond with something as simple as a favorite color, activity, animal, character, object, flower, etc. But you will be surprised how many ideas start flowing once you get a few things on paper. 

Also, kids define themselves by their likes and dislikes so don’t be afraid to mix and match themes. For instance, my daughter wanted a teddy bear theme for her 5th birthday but wanted a Little Mermaid cake. Or, your child may want a princess party but rather than a pretty dress would prefer to wear her favorite t-shirt on the big day. So let her. There’s no need to stick to any rules or try to create the ultimate cohesive theme. It’s her day after all, so encourage her to express herself by taking her thoughts and ideas, no matter how much they stray from the original theme, and incorporate them into the party.


Keep the kids involved during the planning.
My kids love to be involved with all aspects of their party planning. In fact, I often joke that I may be the lowest paid professional on the planet as months before the big day I become my daughter’s very own personal party planner. I don’t mind working for smiles, though, and she has wonderful ideas that only a child’s imagination can conjure. 

For my daughter's seventh birthday party she wanted an owl themed sleepover party. She decided that we should make an owl pillow for each guest and I was crazy enough to agree. I have to admit that I felt more that just a little overwhelmed when 16 kids RSVP'd (um... yes 16!). Even though I spent 3 weeks working every waking minute on the pillows, it was without a doubt one of the best parties I have ever had the pleasure of creating.  Moments that I will cherish forever are working on the pillows with my daughter and giggling as we came up with a poem for each owl. One of my best proud mom moments was watching her learn a blanket stitch in ten minutes flat (the girl is a crafting natural)!  


Let the birthday child create their very own signature dish.
It’s no surprise why kid’s love of baking starts early. The kitchen is a place where they can make a huge mess and get a sugar fix! Serving kid-approved dishes are a must so I have always let my kids approve the menu and create their own signature dishes.  For my son's Diggin' for Dino's party he came up with a recipe that we properly named "Gavin's Diggin' Dessert."  We layered pudding with crushed Oreo cookies, gummy worms, and candy bones in Mason jars.  YUM! He worked for hours on the treats and made a point to show all of his guests the creations.


Oh, and on the big day he also had the brilliant idea to stack the "stegosaurus burgers" like a dinosaur (cute!).


Determine how many kids to invite based on your child's personality.
I’ve read that the best number of kids to invite is determined simply by adding one to your child’s age. I don't necessarily agree with this theory but it is one to consider. Let me offer a few thoughts. On your child’s big day he or she may notice that certain close friends are not there. As an example, the year my son turned three he already had five “besties” from his pre-school that did everything together. They even came up with the theme for his party together. Let me tell you, I would not have had a happy birthday boy if I’d told him he had to choose between them. On the flip side, if your child tends to get overwhelmed in large groups, then a smaller party would be the better option. Parties take any anxiety your child may already have and magnify it by ten. Bottom line is this: As a parent you know your child better than anyone and only you can be the judge of how many partygoers would make the perfect celebration.


Give them complete control over the mulla!  
You are probably thinking right about now that I can not be serious. Oh, but I am!  I’ve found that birthday parties are a great way to teach kids a valuable life lesson—how to set a budget and stick to it. {This method works best with kids who have a basic understanding of math.} Before you make any plans for the event discuss the budget with your child. Go through your child’s wish list and then add realistic costs next to each one. Add it up, and if you’re over the set budget ask your child what he would like to change or cut.

A few places that you can easily save on the budget:


  • Find your nearest dollar store! They offer great prices on tableware (plates, cups, napkins, etc.)
  • Invest in party essentials when you find good deals. These are items that can be reused such as cake stands, cake molds, candy jars, etc.
  • Keep in mind that products displaying licensed characters usually cost more than generic ones. If your kids are set on SpongeBob tableware you can compromise and mix and match with generic ones.
  • Professionally made cakes are a big budget busters. If you need to cut costs that would be the first place to start. 
  • Rather than serve a meal consider hosting a cake and ice cream party.  If you do though don’t hold the party during meal times when guests will assume something hearty will be served and state on the invitation that it is a “Dessert Party.”
  • Prepare and cut food, such as fruit and vegetables, yourself.
  • Rather than buying bottles of water or juice, consider buying by the gallon.


What are YOUR favorite party planning or home entertaining tips? Are there any tips or tricks you find yourself relying on time and again that might be helpful to others?